Wednesday, January 29, 2014

Snips & Snails

What are little printers made of?

In case anyone is curious, I worked up a list of materials and what I paid for them (to the best of my recollection) or what they would cost now.


Materials: About $500-$600 total
   It depends on how much you have to pay for shipping and what you can scrounge up for free. (I did it for about $375 with scavenged/recycled materials and some leftover stuff from previous projects). Since I spread out the spending over 2 years it really didn't seem like much at the time. The projector was the single most expensive item but if you watch eBay you can usually find one for a reasonable price. If you want to have a build envelope larger than 4x6 you might want to look into a higher resolution projector (with a higher price tag).

Electrical:
  • Projector – Mitsubishi XD430U (1024x768, 230W UHP bulb) $150 from eBay
  • 1 Stepper motor for Z axis – Scavenged from old equipment (about $10 surplus from allelectronics.com)
  • 1 Stepper motor for shutter (optional) – also scavenged from old equipment (about $10 surplus from allelectronics.com)
  • 2 axis bipolar stepper driver – I had one, (it was about $40 from eBay a few years ago) obviously if you only use 1 stepper you can get away with the cheaper 1 axis controller
  • AC relay board - to control the air pump. $18 from cnc4pc.com
  • Basic Breakout board – Had one of these too, ($10 from cnc4pc.com)
  • 24V Power supply – Had an extra one. ($20 from eBay) or convert a pc supply.
  • Aquarium air pump - $14 from Walmart
  • Switches – assorted mechanical and optical, had a bunch of these scavenged from old equipment.
  • Parallel printer cable and assorted wire from my Box ‘O Stuff

Mechanical:
DIY Z axis :
  • Scrap MDF / Pine 2x4 – Free?
  • 1” Steel angle bar stock – about $16 from Home Depot
  • 1” Aluminum angle bar stock – Had some from a previous project (about $5 from Home Depot)
  • 8 roller skate bearings - $5 from eBay
  • Assorted Nuts, Bolts, Washers and Corner braces – about $10 from Home Depot
  • Acme threaded rod - $19/3ft from McMaster.com (I only used 16” so really $9.50)
  • Coupler – Had one of these too ($15 from dumpstercnc.com)
  • DIY leadnut – You can make one for next to nothing, if you have the Delrin, or buy one (about $20)

Resin Vat:
  • HDPE Cutting board material 1” - $17 from onlinemetals.com. I could probably have used MDF if I wanted to go extra cheap.
  • HDPE cutting board material ½” - $9 from onlinemetals.com. I could probably have used MDF if I wanted to go extra cheap.
  • 2 Hinges – medium/small brass from Lowes $4
  • Glass – $10 for a 12”x12” piece of double thick (5mm) glass from Delphiglass.com. (I cut 3 windows from this so I have a few extras ready for quick replacement)
  • Bolts, threaded inserts, washers – about $8 from Home Depot
  • Sylgard 184 – $50 / .5 Kg from eBay. That’s probably enough to coat 20 or more 4x6 pieces. It’s really a consumable but I’ll include it in the build cost.
Build platform:
  • More scrap wood
  • HDPE scrap from the vat construction
  • Cheap cutting board - 3/8" thick about $3 from Walmart
  • Aluminum angle left over from the z axis
  • ¼” 4x6 Aluminum plate – about $5 from onlinemetals.com
  • More corner braces - $5 from Home Depot. I could have cut these from scrap wood and glued them in place but I got lazy.
Structural:
  • Scrap MDF, Plywood, Melamine shelving
  • Scrap steel for projector mounts and front supports – from an old server rack mount
  • Even more corner braces - $5 from Home Depot
  • Red Plexiglas for door and projector shutter (optional but nice) - $30 from local supplier
  • Drawer pull, hinges and magnetic cabinet latch – Had these in my parts box. (About $7 from Home Depot)
  • Misc screws/bolts – from workbench

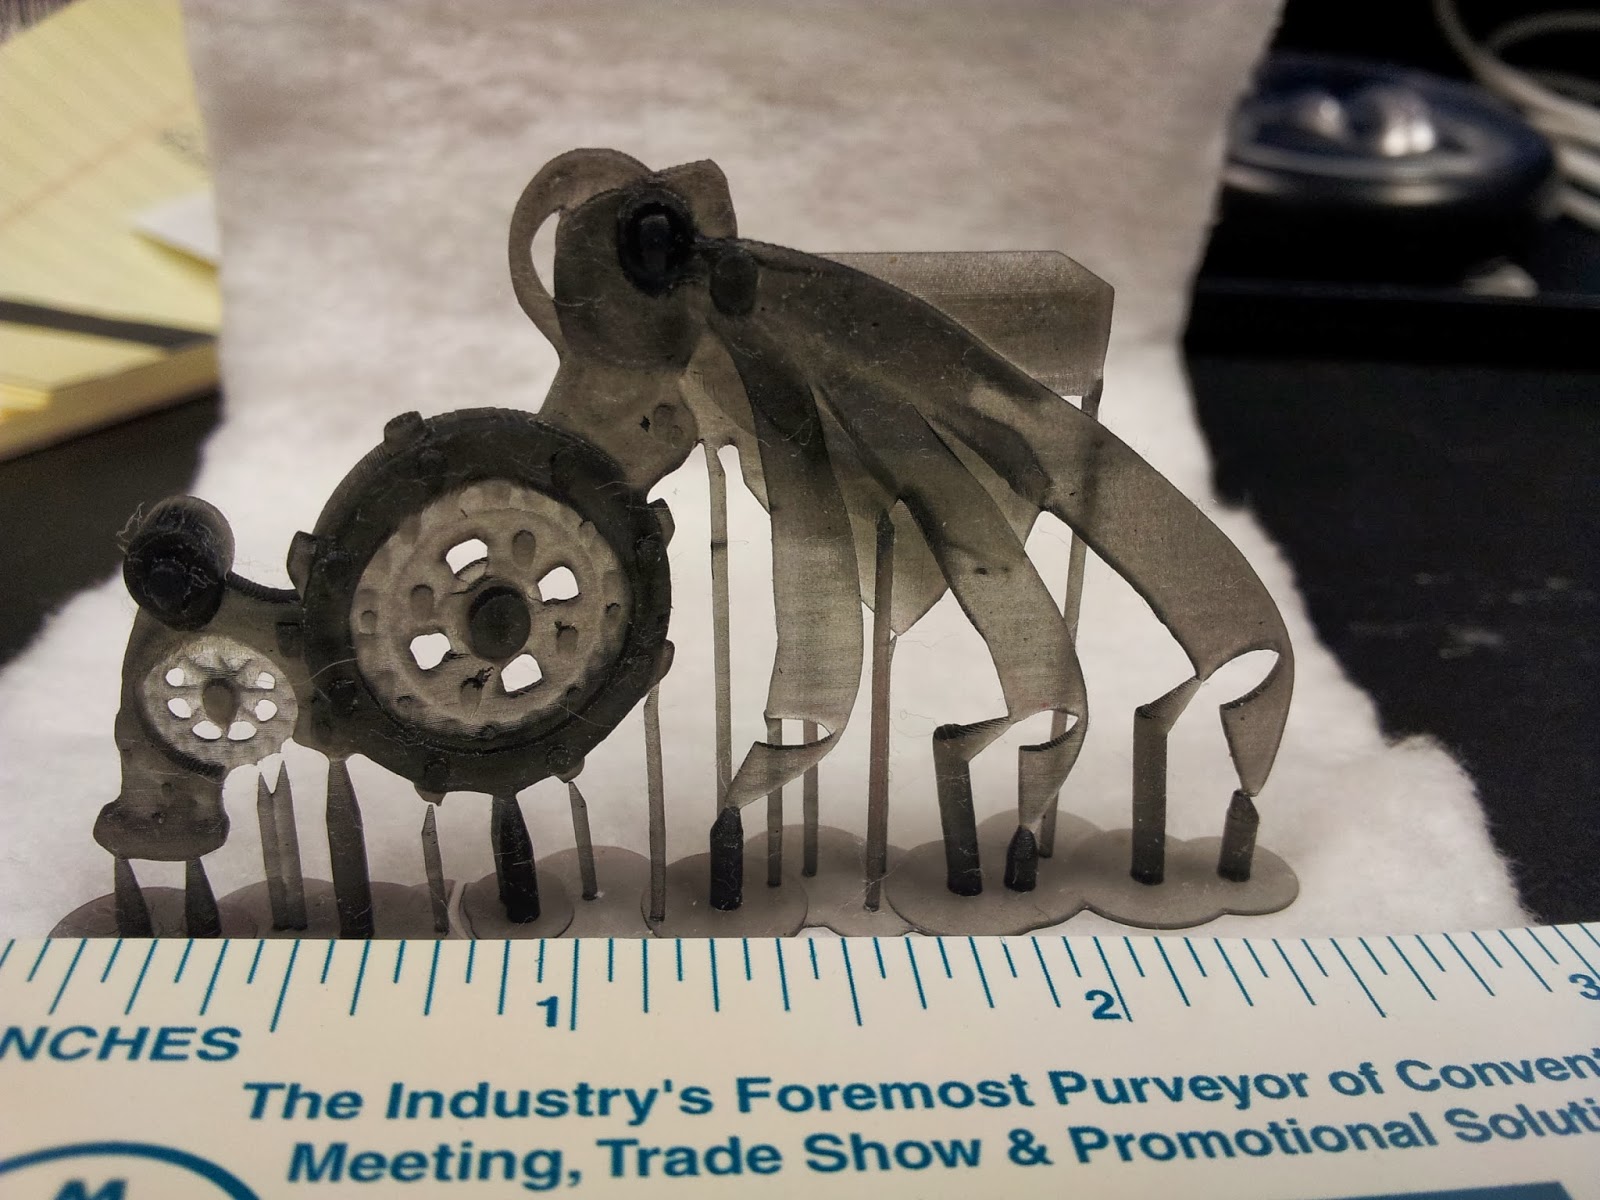
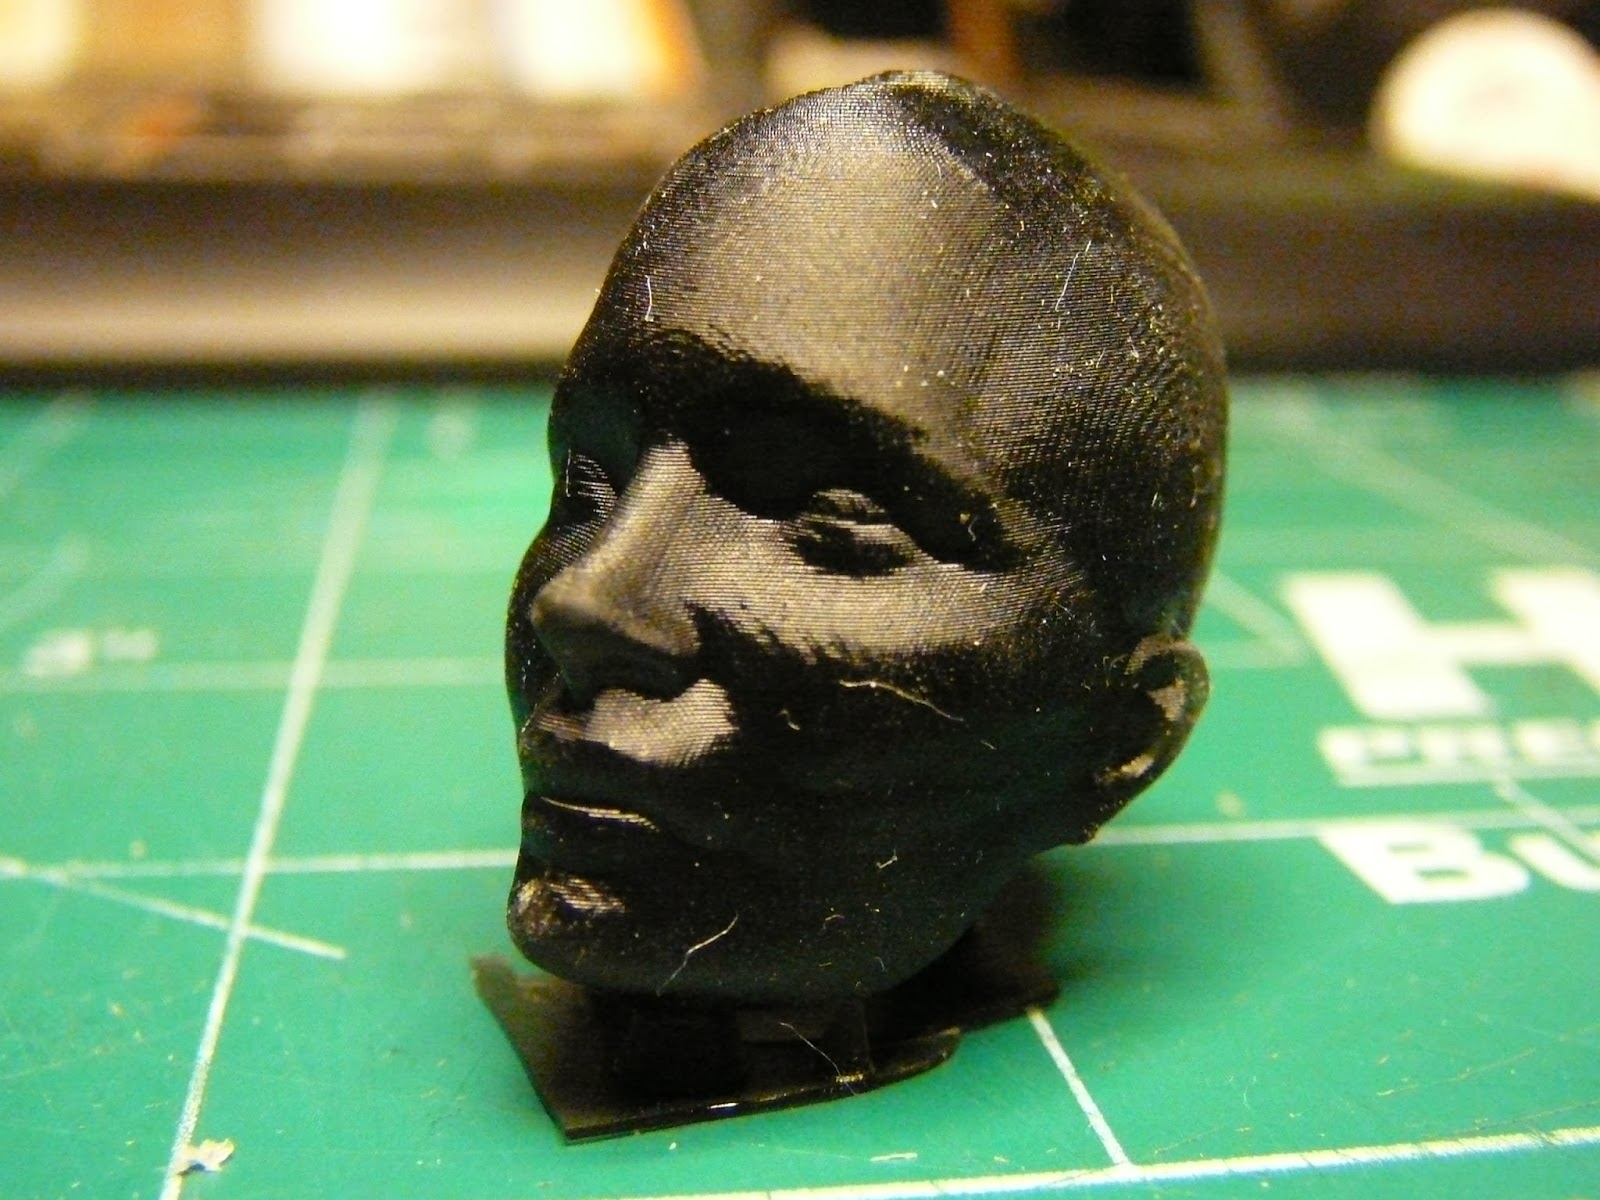
I'm already thinking of ways to improve/simplify the design and will undoubtedly recycle most of the parts for the MkII

Monday, January 6, 2014

For your viewing pleasure

In case you are interested and have about 8 minutes to kill, here is a video I shot while the Dalek was printing. I have a float on a lever in the resin tray (on the left side) that blocks an opto interrupter. Every 10 layers the printer checks the sensor and if it is unblocked it triggers a relay that turns on a fish tank air pump. Air is pumped into the resin jar and forces resin up the tube to the vat. the hissing sound is a pressure relief valve (a small hole in the cap) on the jar. Without it the resin kept flowing for quite a while after the pump stopped. You can see I eliminated the power tilt and went with a passive design. The tray is hinged on one side and allowed to lift and fall back by itself. The thud is the sound of the tray dropping back down. Interestingly, You see that after the first few layers there is almost no movement of the tray. Once the build platform gets some distance from the floor it doesn't have the suction when it lifts. Exposures with small surface areas release so easily that the tray often doesn't lift at all. Unfortunately that also makes it difficult to tell if there has been a printing failure, such as the part separating from the build platform. I changed the front of the resin tray to clear so I could spot a failure before it made a big permanent blob and ruins the Sylgard.


The first couple layers get a longer exposure (about 9 seconds) to stick it to the build plate. After that the exposure is 5.5 seconds per layer. The Z axis lift is also higher for the first few layers. I found that after about 5 layers I only had to lift about 1/8". That helped cut some time off the total print run.

 I also changed the vat floor. My first floor was a piece of 1/4" Plexiglas with a Sylgard 184 coating. I have since switched to regular double thick glass. Nothing special just plain glass. By using glass I can heat cure the sylgard in a toaster oven in about 40 minutes instead of waiting 24 hours for it to cure at room temp. I made the Sylgard layer a little thicker and so far it has held up well, 5 or 6 prints with no noticeable degradation. Also added is a red plexiglas filter/shutter that blocks the lens before and after printing to eliminate accidental exposure during set up and clean up. you can hear it being moved out of the way just before the projector comes on the first time.

Sunday, January 5, 2014

Doctor! Doctor! Give me the news.....


Here are some things I have printed with my completed DLP printer. I'm still trying different resins and pigments to find the right combination of performance and cost.

There is a limit to the printer's ability to produce really small details. surface details like the lettering on the call box print ok but details that extend away from the larger body like the door handle or the posts around the light  don't get enough energy from a tiny dot of light to cure the resin.

TARDIS
EX-TER-MI-NATE!

The Dalek came out really well. The TARDIS and Dalek were both from Thingiverse.com. I printed them both hollow to conserve resin. I used MakerJuice subG+ Orange resin from makerjuice.com It works pretty well but I did notice some over curing of the layers. I think I need to add some more pigment. I'm also not a fan of the translucent orange. It doesn't photograph well and it looks awful. The orange does do a good job of blocking the wavelengths that the resin is sensitive to. I'll try adding something to make it more opaque and less fluorescent tangerine.

The Dalek took about an hour to print. 470 layers @ 5.5sec exposure + z axis cycle time (about 2 sec) and pauses to top off the resin level.
 
Here are some tests I did with the MakerJuice SubG+ Black resin.


My first  attempts to print more "mechanical" stuff.
You can see the over curing problem on the undersides of the bolts.

 
This one came out really well. The problems I am having with the over curing don't seem as noticeable on more organic shapes. It's only the hard edged overhangs where it is noticeable.
 
 
I wanted to see how small I could go.


This was my first successful print. I set it up so there were no supports needed. I used Spot-A GP unpigmented resin with a mix of black and white pigments. I was going for a neutral grey similar to the Form1 resin. I like the more opaque pigments, it is much easier to see details. The spotA resin cures faster than the SubG+ but is more expensive.